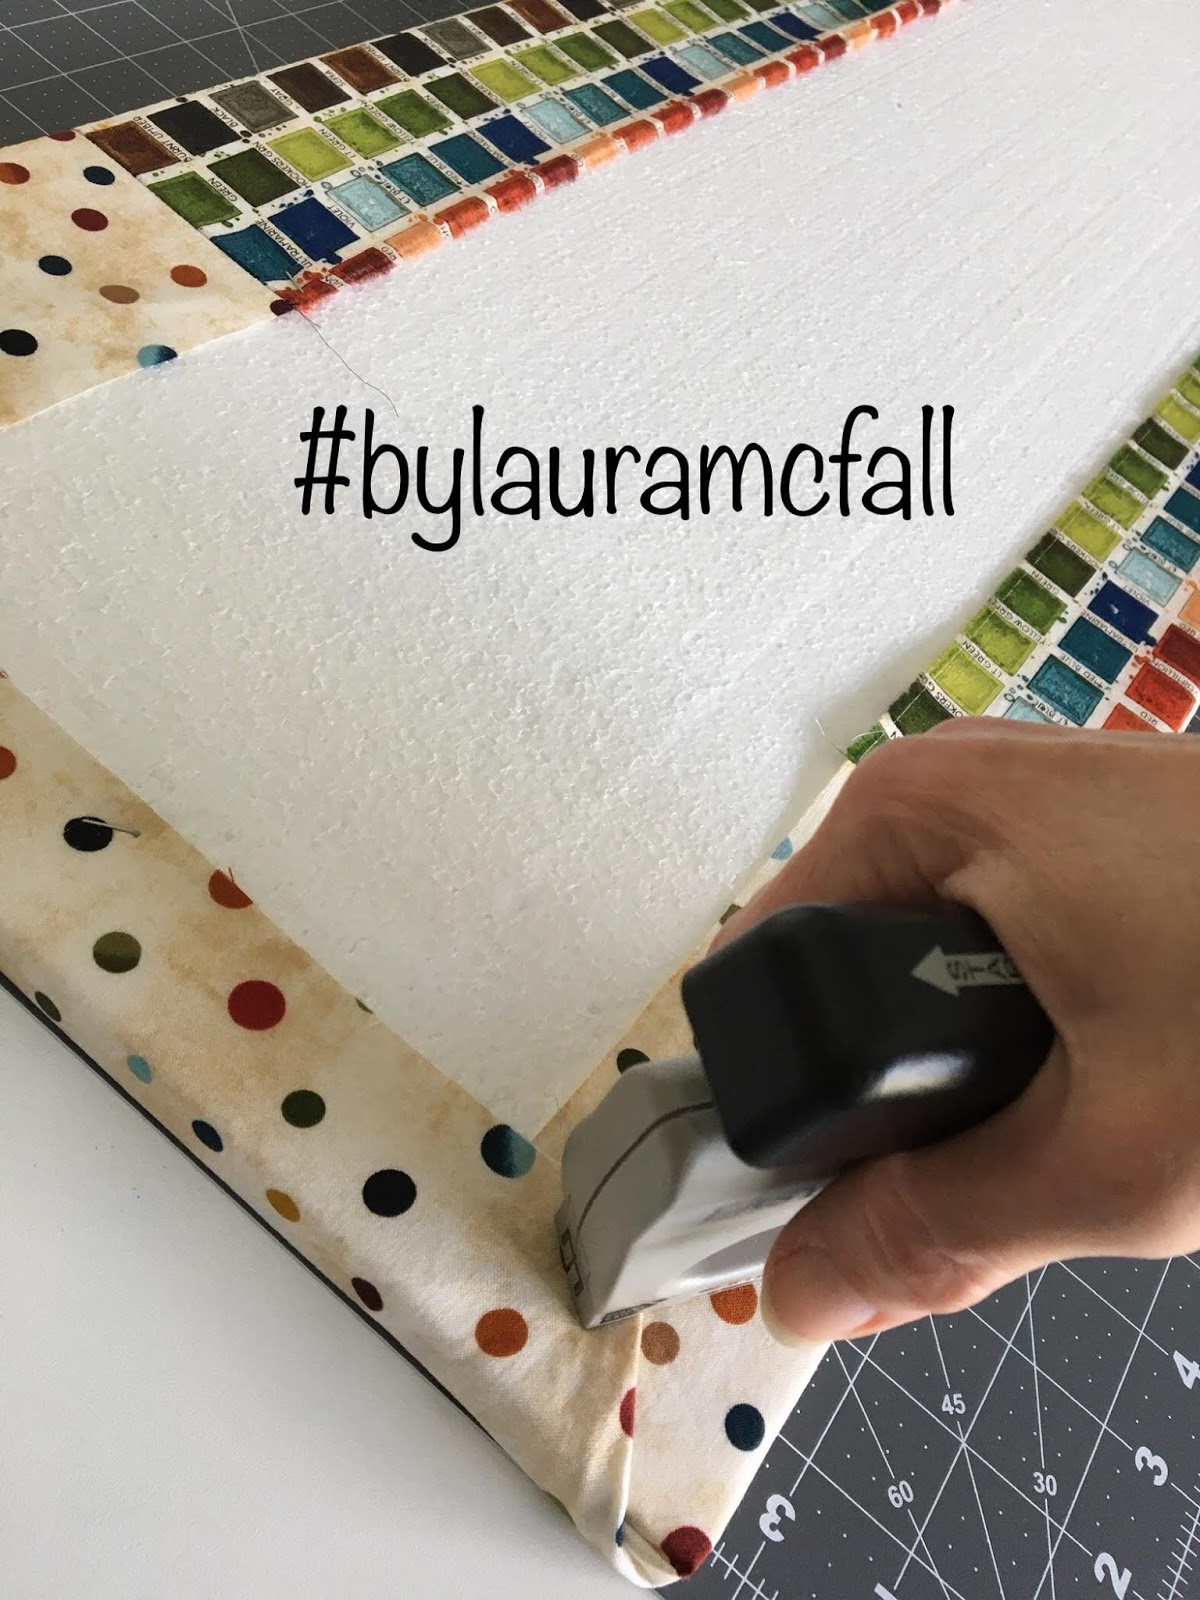
Thursday, December 3, 2020

My Favorite Things...

Welcome to Day 4 of the #31dayblogchallenge2020.  Today we are discussing our favorite sewing room tools.

I do not have an excess of tools, scissors or rulers, but I make sure the ones I have are good quality.  Having the right tools for the job is very important and really reduces frustration.  For example, tweezers: using them to pull the thread from behind the needle after threading or if it pulls up too short is so much easier than trying to get my big fingers in there and it’s probably a lot safer too.   I use brand name rotary cutter blades but still don’t change it soon enough.  Does anybody?  I see reference to generic or industrial blades online and often there are reports that they just don’t last very long or work very well.  Why go through that frustration?  For me, it’s worth the extra cost to avoid the frustration.

 I mentioned my awesome folding sewing table on Day Two, it is definitely on the Favorites list.   My darling husband surprised me with it after watching me struggle to cut out my daughter’s prom dress on the low bed.  I’ve had it for 16-17 years now and it’s as good as new.  The white laminate top is 30” x 60” and folds down to 30” x 12”.  The counter height legs all have wheels so I can roll it pretty much anywhere.  There’s also an ironing pad that fits the entire top so I can press fabric yardage, quilt tops and backing easily.  The laminate top is scratch resistant so it’s not all marked up from pin basting.  The newer versions of the same table have a storage area in the center section.  That would be nice, but I’m not going to trade it in.


In 2004-5, I got my first serger and it came with a pair of long nose tweezers to help with threading the machine.  I started using them for EVERYTHING and my favorite pair are the ones that came with that machine, even though I passed it on years ago.  As you can see in the photo, they (TL) work great for catching the thread behind the needle, (TR) pulling pins that are under the foot so I don’t stitch over them, (BL) work as a stiletto when I can’t find the actual one and (BR) when I’m pressing so I don’t burn my fingers.  I also use them to pick threads if I have on my quilting gloves.  The tweezers are always within reach because they are used a lot.  Beware though – not all tweezers are created equal – I still use those first ones because they actually WORK to pick up fine threads.  I have rejected a few pair because they don’t pick up anything.


Two other favorite tools are used for pressing but neither can be purchased at the sewing store.  First is a wooden board – mine is 12” square – that is wrapped with one layer of quilt batting.  My husband took 3 layers of leftover 1/4” plywood (lauan board), glued and screwed them together and sanded the edges smooth.  I tightly wrap a piece of leftover batting around it and tape it on the back with painters or masking tape.  It is perfect for pressing blocks super flat.  When the batting starts to get flat, stained or worn out, I put a new one.  I tried two layers and that’s too squishy.  Second is a metal guitar finger pick.  Hubs also plays guitar and got a set of finger picks to learn a new technique.  He didn’t really like them and set them aside.  I was pressing blocks one day and kept almost burning my fingers.  I saw the discarded picks laying on the desk and put one on my finger to use as an extended fingernail.  It worked beautifully and I now use them all the time.  I like to press my piecing seams open and the finger pick lets me get in between and open the fabric and also protects my finger from the heat of the iron. 

For photos of many of my stitching projects, check out my Facebook Page – by Laura McFall (https://www.facebook.com/byLauraMcFall) – where you can peruse all of the albums of my creations.  I have also been on Instagram since 2019 - @bylauramcfall.  On either platform you can search #bylauramcfall or #flamingomooncampers to see what we’re up to.  


Wednesday, December 2, 2020

Better than a Dream

I am currently stitching on a Brother 8500D, or THE Dream Machine.  I’ve had this machine since January of 2015.  Before that I used a Brother 4500D, the Duetta.  That was my first Brother.  For a while I had a second-hand Brother 6-needle embroidery machine.  That was great fun, but I didn’t use it very much so it moved on to a new home.  I’ve also stitched on various Singers and the first machine I ever purchased was a JoAnn Sonata, which I still have.  It’s a real workhorse.

The Dream Machine, or “Dreamy” for short, has a really large embroidery area – 9.5” x 14” and some great features that allow for on screen editing of designs and projects.  It also has a scanning feature for creating embroidery designs from line art and also to aid in placement of the designs on garments, blocks and other items. 


For regular sewing it has many utility stitches, decorative stitches and stitch adjustments.  I appreciate the ability to fine-tune the needle placement for a scant quarter inch seam.  The machine stitches very smoothly and I very rarely have to make any tension adjustments.  When I’m piecing half square triangles or other stitching that requires accurate placement of stitching lines, there is a laser beam that shines onto the fabric.  By using the laser light, I do not need to draw the pencil lines on the centers of the squares. 


In addition to the laser, I think my favorite feature is the dual feed foot.  It’s not exactly a walking foot because it is belt driven and doesn’t “walk”.  The foot has a large open “toe” that allows for many kinds of stitches when using the foot.  It quilts over thick pieced items very smoothly.  I made a tote bag with pieced blocks and then fused the fabric to flex foam and quilted it using the dual feed foot.  After laying in all of the straight lines I was able to go back and free motion fill with pebbles. 

The machine has an 11” throat so there is plenty of room for quilting on large pieces.  I have the accessory extension table so I am able to manage free motion quilting quite well.  Dreamy also works well with the Westalee ruler foot and quilting templates.  I have been practicing quite a bit trying to warm up for a queen size that I want to do a large Baptist fan design on. 


In my introduction on December 1, I mentioned that I do a lot of RV Quilting.  The Duetta machine and accessories now live in the RV so I am able to stitch whenever we have a rest or rainy day.  On our last trip I brought my embroidery unit to work on a couple projects.  The conundrum was that I didn’t know exactly what colors of thread I needed so I started with a few spools of each color family.  I have these great containers from Target that are 12” x 12” square and about 6” deep.  I had quite a lot of thread in the container and it wasn’t full yet, so I added some more… then some more… a little more… rearranged it a bit and wah-la! – the last spools all fit!!  I brought my entire rayon embroidery thread collection in a half cubic foot container!  I really didn’t need to, but it was fun to know that I can.  Of course, the color I needed was always on the bottom…. 

As much as I love my Dreamy, I am in the market for a stationary quilting machine.  I have my eye on the HQ Capri.  I love the fact that it sets perpendicular to me and I have a great view of the needle.  Probably my biggest challenge with quilting on the domestic is that my view of the needle is obscured by the head of the machine.  It also comes with an adjustable height table that has sensors to regulate stitch length.  The entire footprint will fit well into my existing space with a bit of reconstruction.  The second desk top will need to be removed and resized, but I have high hopes it will all work out nicely.

For photos of many of my stitching projects, check out my Facebook Page – by Laura McFall (https://www.facebook.com/byLauraMcFall) – where you can peruse all of the albums of my creations.  I have also been on Instagram since 2019 - @bylauramcfall.  On either platform you can search #bylauramcfall or #flamingomooncampers to see what we’re up to. 

Tuesday, December 1, 2020

Studio Tour - Where the Magic happens.....

Over the years I have had a variety of sewing spaces, some dedicated, some shared with the rest of the family.  I have been tucked into a corner of the bedroom and cut things out on the bed; I have had a whole room with minimal furniture so I still had to cut out on the bed or dining table; I have shared sewing space in my young son’s bedroom so my older son could have his own room.  Currently I have half of a large room and closet dedicated to sewing and storage.  I have also overflowed into the small bedroom for additional storage and a design wall. This room also doubles as the exercise room and other misc. household storage. 


Before my husband retired from working in 2018, the other half of the large room was his daily workspace.  I had to be quiet because he spent most of his days in teleconference meetings.  We really started developing “the sewing room” or “the front room” (because it’s at the front of the house) in 2007 when I stopped working full time to be a homemaker.  We painted the sage green walls a beautiful light sea glass blue; pulled the gray carpet and installed pecan laminate flooring.  The room is about 15 feet long and one wall is almost ALL closet that’s three feet deep!  We installed adjustable wire shelving almost floor to ceiling.  One end holds all the home office and computer stuff and the other end is all fabric!  The opposite wall is a large 60” x 60” window and matching laminate blue desk tops fit perfectly into either corner at the ends of the window.  The window faces onto the main street into our neighborhood so I can keep a good watch on the goings on, including the school bus stop across the way.

Space in 2007                                                                                   Space in 2014
            Shiny and brand new.                                                     Full  on project and/or cleaning mode.


I usually have the ironing board set up in front of the window.
  I also have a large folding cutting table on wheels that I just LOVE! It opens up to 30” x 60” for cutting out garments or pressing and basting quilt tops. I can put half of it down if I need more room to move around it and I can drop it completely down to just 12” x 30” that perfectly fits into the closet in front of the wire shelving.  I love the wheels because I can keep it up against the closed closet doors or roll it out into the middle of the floor so I can walk all the way around it.  We added a track light strip on the wall above the closet for additional lighting.  This light strip has its own switch separate from the main fixture.  I have two wall cabinets over the sewing desk that hold machine accessories, books, project bins and notions (buttons, zippers, trims, etc.), and the remainder of my quilting and sewing thread.  A large bookshelf holds additional machine accessories, sewing and quilting books and patterns, notebooks of design templates and ideas and other various stuff. 


Quilting fabric is arranged by color on the open shelves.  A couple of years ago I added a curtain over it as I noticed light fading on the crease of some of the flat folded fabric.  Direct sun doesn’t reach into the room that far, so I decided the fading must have come from the CFL “daylight” bulbs in the light fixtures.  I try to keep the closet closed, but adding the curtain has added an additional layer of protection.  All of the bulbs are now LED so hopefully fading has been eliminated.  Large bins at the bottom hold non-quilting fabric and shoebox sized bins at the top hold my scrap saver system (more about that in a future post) and sewing patterns.  There is an open area in the lower center portion of the closet for items on hangers and enough space for a dress form.  Embroidery hoops hang from hooks at the back of the closet wall and rolls of stabilizers and interfacing hang on the back of the door. 

Behind the door is my best kept secret – a full length mirror on a piano hinge!  Not only does the mirror swing out for viewing at the center of the room, but it has a 1 1/2” frame around it with lattice board shelves that hold my entire embroidery thread collection!  It closes snug against the wall so the thread is stored dust and light free. 


A couple years ago we had the wild hair idea to cull through all of our “various stuff” and prepare to downsize all the way to Full Time RV living.  So much stuff went out the door, but there is a LOT left!  I had planned to stitch through all of that fabric, but alas….  there just isn’t time, is there?  We have tabled the full-time plan for now, but still working towards eliminating all the STUFF.  My goal is to get all of the sewing back into one room and closet with the exception of the 4’ x 8’ design wall – there simply isn’t any blank wall in the sewing room.  I have added foam bulletin boards to the closet doors so I can display favorite blocks, project lists and other ideas. I posted a how-to here

I hope you have enjoyed this quick tour of my sewing space!  Comment below with your favorite part and feel free to ask questions!  Tomorrow I’ll introduce you to “Dreamy”, the star of my sewing room! 

Please check out my Facebook Page – by Laura McFall (https://www.facebook.com/byLauraMcFall) – where you can peruse all of the albums of my creations.  I have also been on Instagram since 2019 - @bylauramcfall.  On either platform you can search #bylauramcfall or #flamingomooncampers to see what we’re up to. 

This blog challenge is also a hop – follow this link to see the other participants and show them some love, too!! 


Monday, November 30, 2020

Welcome to byLauraMcFall!

Howdy!  Welcome to #bylauramcfall!!  I have toyed with this blog for several years now covering a few different topic areas.  If you look through my posts you will see many from 2015 about my 50/50 personal challenge to decide whether or not I am a runner (Running Towards Fifty).  I have pretty much decided I am not a “runner” but I do like to walk fast for fitness and hike slow for leisure.  After the 50/50 2015 posts there are several from 2016-2018 under the tag #ministrymessage.  That was a growth phase where I went through Certified Lay Minister training in the United Methodist Church and was preaching once a month at a senior living center near my home.

Sprinkled throughout are a few sewing tutorials and step outs of different projects.  I toy back and forth between really hunkering down and creating a sewing “business” or just keeping it as a recreational hobby.  It’s not really a business because there isn’t any income – these days, I sew for pleasure and occasionally sell something I have created.  I don’t make any money – what I get for my pieces barely covers the expense.  Typically, most items are given away.  Years ago, I did sew for a little income on the side.  As a young Army NCO wife overseas, I found a niche making ballgowns and custom clothing for the officers’ wives.  In the earlier ‘00s, I would offer handmade goodies in exchange for fundraising donations to Relay for Life. 

But…  I would love to create a strong virtual community with a platform to teach and encourage others in various areas of stitching.  I am hoping that by joining this challenge I can build an interactive audience and begin to create that community.  I would also like to increase my online visibility so I have the opportunity to do things like be an Island Batik Ambassador, or product tester/designer for new fabric lines, etc.  So, the rest of this entry is a bit of a resume’ for the types of stitching I do and some of the crazy projects I have gotten myself into:

I use the word “stitching” because I am not limited to quilting.  I sew.


I sew clothing (for myself, my children when they were little and now my grandchildren) and have also made wedding gowns, prom and ball gowns and a very fluffy pageant gown for a young girl.  I spent days designing and then hemming circular curved sparkly organza pieces with fishing line to create the vertical ruffles.  Of course, within a few months of finishing the gown, very similar fabric was available by the yard at the fabric store. 


I sew craft items including stuffed animals, tote bags, aprons and kitchen items, pillows and home décor.  One time I recovered two poolside swinging futons to include the large rectangular umbrellas that covered them.  The material was basically woven plastic and was a bugger to stitch and the pieces were huge and heavy.  I set up one of those six-foot plastic banquet tables to help hold the weight which, in turn, generated enough static electricity it probably could have powered the sewing machine. 


In the fall of 2008, I purchased my first computerized embroidery machine and have made many items with it to include personalized Christmas ornaments for our grandchildren every year since.  Some years they’re all the same design and other years they are each unique.  We are up to 8 grandkids over 12 years.  It’s always an adventure trying to come up with each year’s design and making sure I haven’t duplicated any yet.

In 2018 I made PJs for all 12 grandkids and 2 daughters plus 2 DILs with embroidered t-shirts – 16 stitch-outs altogether.  Our two sons plus 2 SILs were left out, but they will get personalized embroidered BBQ aprons and/or accessories (hopefully) this year. 


I began really getting into quilting in 2010 and have incorporated embroidered blocks into quilts a few times.  It didn’t take long to learn the terms UFO – Un Finished Objects and PHD – Projects Half Done.  I have made many, many quilts, most are throw/crib size, wall hangings or smaller, but I have made a handful of twin-size or larger.  It’s funny how the longer I do this the larger the quilts are getting… 


My husband and I also travel with a 35-foot Fifth wheel RV.  We have been camping for years, but only after getting the “5er” in 2015 did I learn about #RVQuilting.  Yes, it’s a “thing”.  There’s at least one huge FB group, RV Quilters.  We share our projects and sewing set ups while camping at a variety of campgrounds from RV resorts with activity centers to state parks to boondocking, which means without hooking up to water or electric sources.
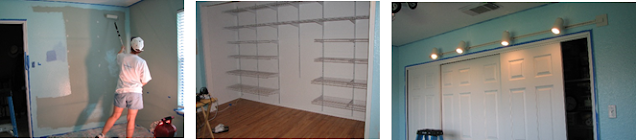
  We have made renovations so I have a complete dedicated sewing area and I have completed many projects both in and for the RV.  One of my recent favorites are quilts for our split recliner.  The pattern is by Victoria Findlay Wolfe (vfwquilts.com) and is called Negative Space from her book Modern Quilt Magic.  The original is one large quilt but I skipped the step of sewing the two sections together with additional side border pieces and kept them separate so the individual sofa pieces would recline independently.  This photo also shows the pieced cornice covers I made with a stack and slash technique creating multiple unique 6” blocks. 

I hope you have enjoyed this general outline of my stitching career….  Please continue to follow along for this #31dayblogchallenge2020 to learn a lot more about #bylauramcfall.  Comment below if I can answer any questions or explain anything further. 

Please check out my Facebook Page – by Laura McFall (https://www.facebook.com/byLauraMcFall) – where you can peruse all of the albums of my creations.  I have only been on Instagram since 2019.  On either platform you can also search #bylauramcfall or #flamingomooncampers to see what we’re up to. 

#31dayblogchallenge2020 

Friday, January 31, 2020

How to make fabric covered lightweight design walls OR lightweight bulletin boards:

Purchase these foam panels from a hardware store, about $10. There are 6 panels in the package, I’m only using four.

Optional - Cut to desired size.
If making a design wall, it is best to use flannel fabric as it has a soft texture so quilt blocks and fabric patches will cling without pins. If making bulletin boards, any cotton or woven fabric should work.

Cut and/or piece fabric panels at least 6” bigger than the foam panels. I used the full size of 48” tall by 13 5/8” wide. 48+6=54” and 13.625+6=19.625”. Because cotton fabric is 42” wide, I split a yard and a half (54”) down the center for two 21” panels of polka dots. I only had a yard (36”) of the paint squares and I had about 18” of the dots left so I cut it into 4 pieces, each 9” y’all by 21” wide. I sewed these onto the tops and bottoms of the other fabric, which I also split in half lengthwise.
All together, four panels took 3 yards of fabric costing about $20, on sale.
Center the foam pieces on the fabric panels and fasten with lightweight staples or thumbtacks. My staples would only go through 1-2 layers of fabric.


For added security, I put a layer of clear packing tape over the staples and edges of the fabric. This step might not be needed depending on your chosen method of adhering the fabric to the foam.


The final step is to add some sticky back Velcro to the top. I used 2.5-3” pieces at the top, about an inch down. Consider where the flat spots are on your door or wall and the desired placement of your boards. I stuck the soft loop side to the board and the rough hook side to the doors, but did not separate the pieces. I exposed the sticky part and stuck both board and Velcro all together.


Repeat steps for the desired number of panels and TA - Done!!! Your very own design wall for less than $50.